
Run your first Mote Translator session
Mote Translator gives your students live captions and translation of what you say, in their own language, on their own phone, tablet or laptop. This guide takes you from signing in to a live lesson your students can join with a link or QR code. It takes about five minutes, and the example is a middle school physics class.
You need a Mote account, some translation hours, and a computer with a working microphone. Every adult can get one free trial hour. For more on hours, see Mote Translator hours and pricing.
Step 1: Sign in
- Go to translator.mote.com.
- Click Get started and sign in with your Mote account, or create one.
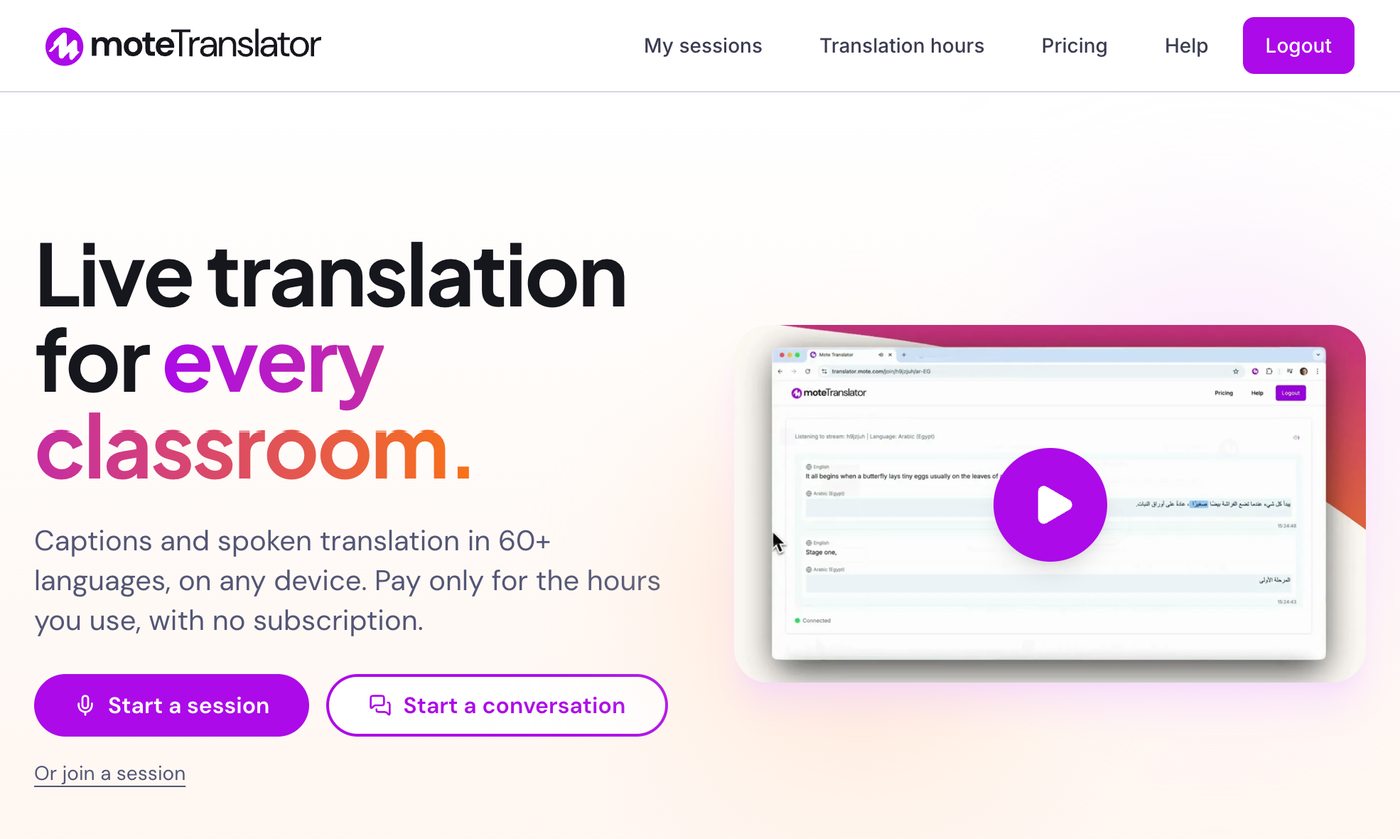
- Back on the home page, click Start a session.
Step 2: Create a channel for your class
A channel saves your settings and gives your class a join link that stays the same all year. Set it up once and reuse it every lesson. If you teach several classes, one channel is usually enough.
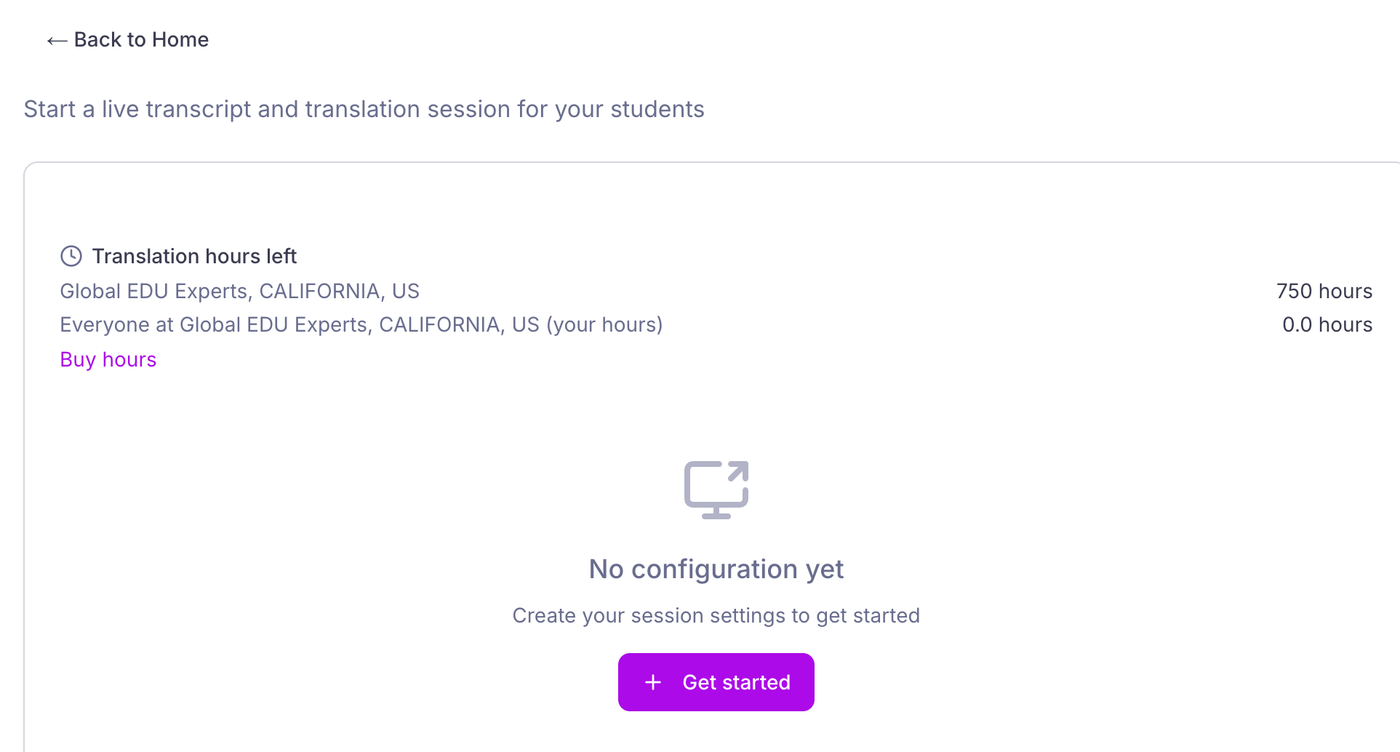
Your translation hours are shown at the top of the page. If you have none, see Mote Translator hours and pricing.
- Click Get started to open Create New Channel.
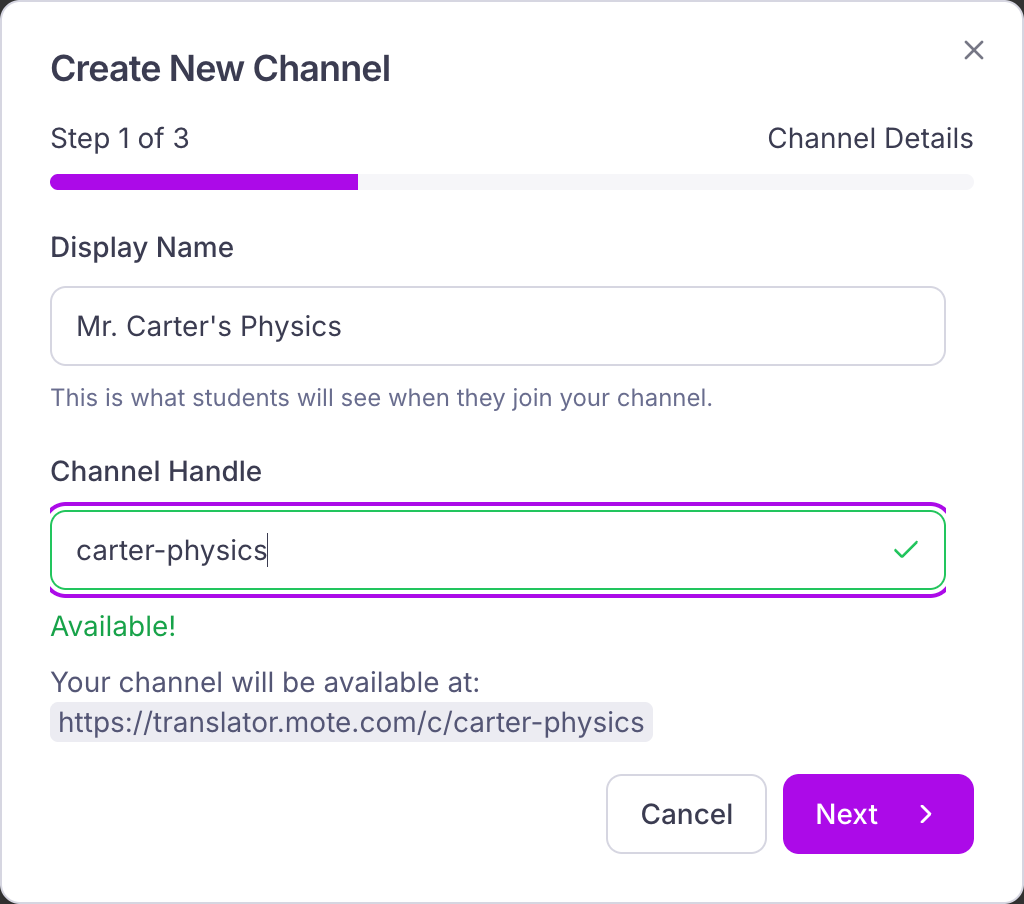
- Display Name: what your students see when they join, for example Mr. Carter's Physics.
- Channel Handle: the end of your join link, for example carter-physics. Use lowercase letters, numbers and hyphens, at least 6 characters. Handles are shared across all of Mote, so if yours is taken, pick one of the suggestions or try another. You can't change the handle later.
- Check the join link shown under the handle, then click Next.
Step 3: Choose your languages
- Under You speak, choose the language you teach in.
- Under Languages offered, click the Any Language tab. Each student can then choose their own language when they join.
- Click Next.
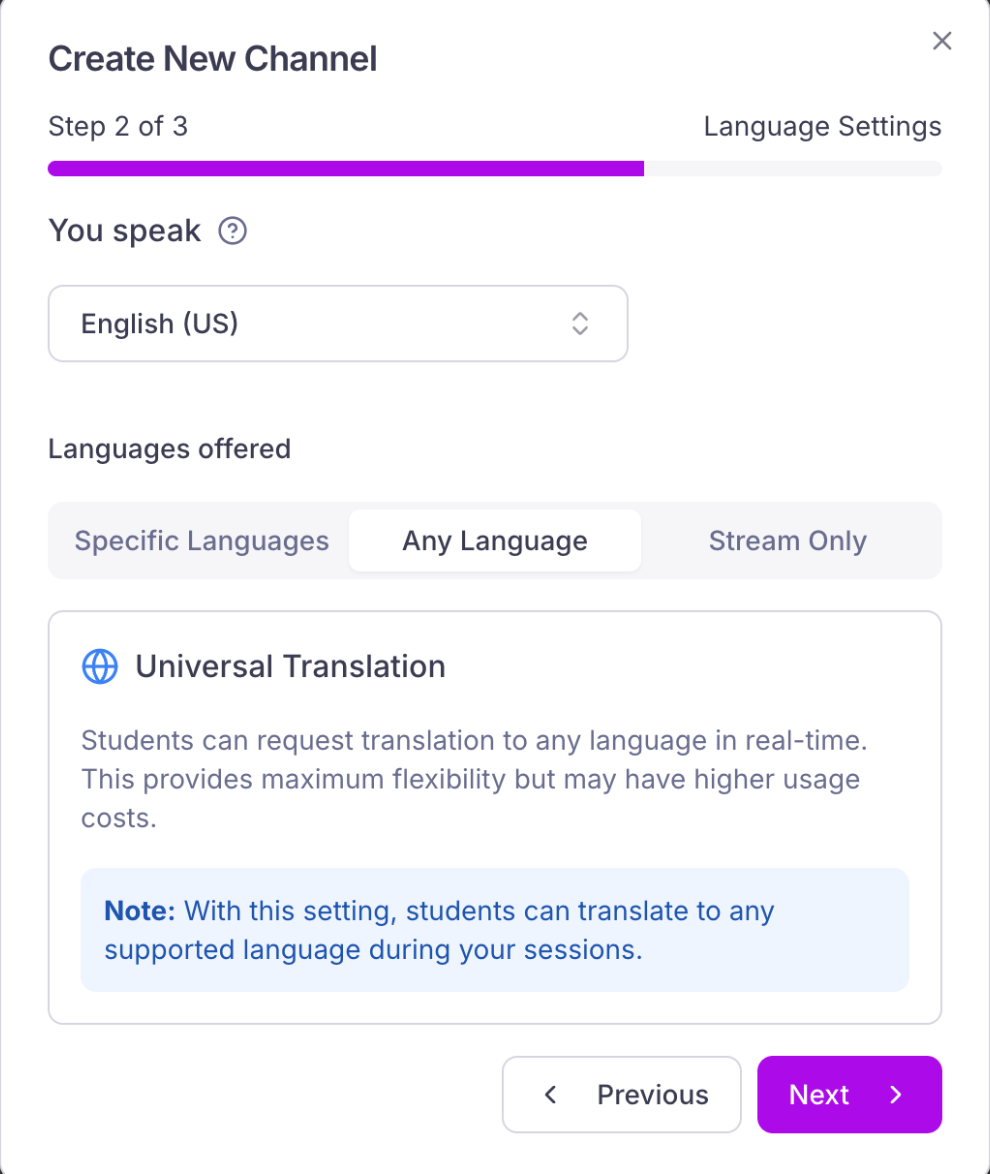
The other tabs: Specific Languages limits the choice to languages you pick, and Stream Only gives captions in your own language with no translation.
Step 4: Add your subject vocabulary (optional)
List the words a general speech model might get wrong, such as subject vocabulary, names and acronyms, so they are transcribed and translated correctly.
- Type each term on its own line, for example Newton's first law, inertia and net force. Write them in the language you teach in. You can add up to 200.
- Decide on Keep terms in ... where possible. It is ticked by default, and keeps your terms in English in every translation. For subject vocabulary you want students to learn in their own language too, untick it: a Spanish speaker then sees inercia and fuerza neta. Leave it ticked if your terms are mostly names, products or acronyms.
- Check the Preview Settings, then click Create Channel.
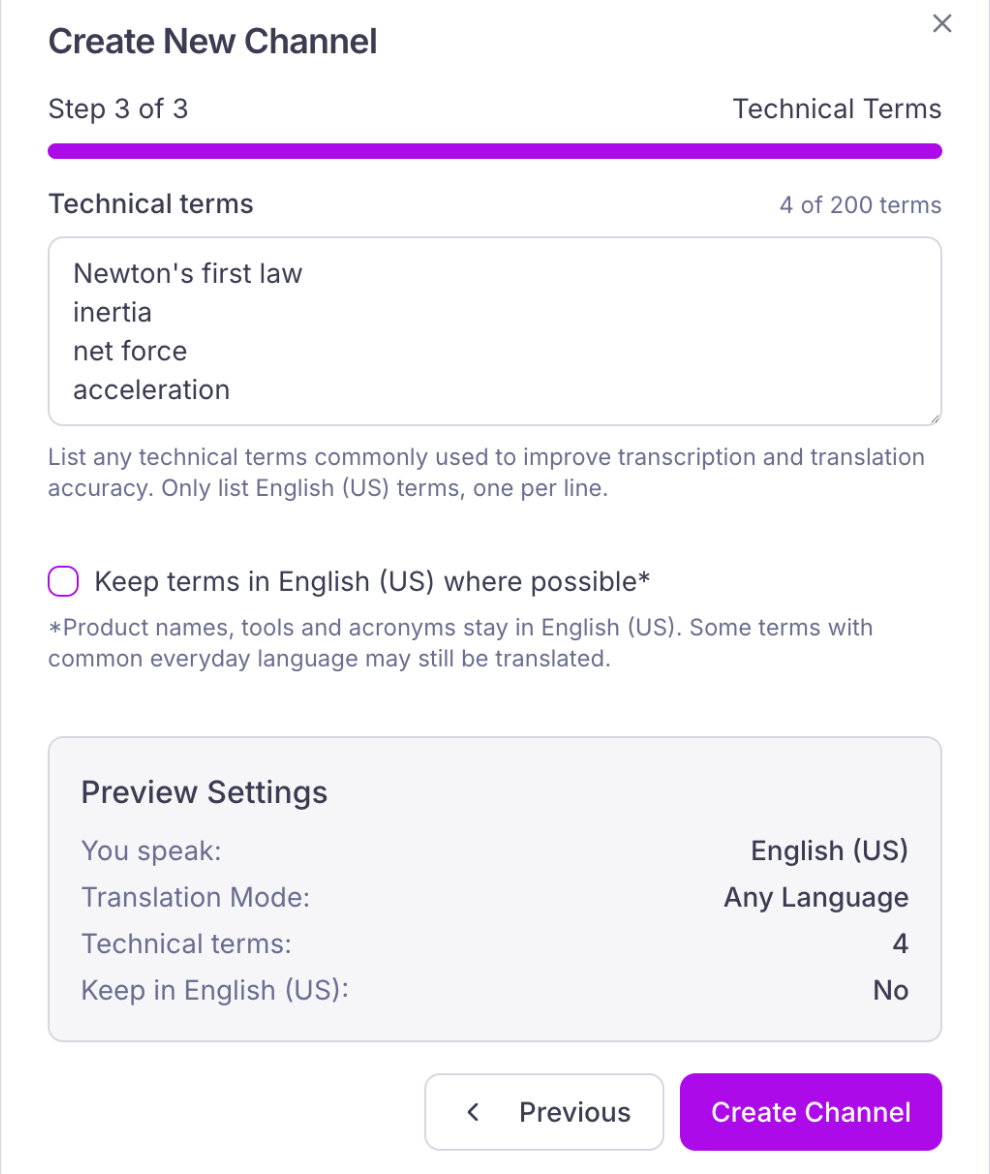
You can change these settings at any time with the settings icon next to your channel, for example to add the vocabulary for your next unit.
Step 5: Start the session
- Your new channel is listed as your default settings. Click Use next to it.
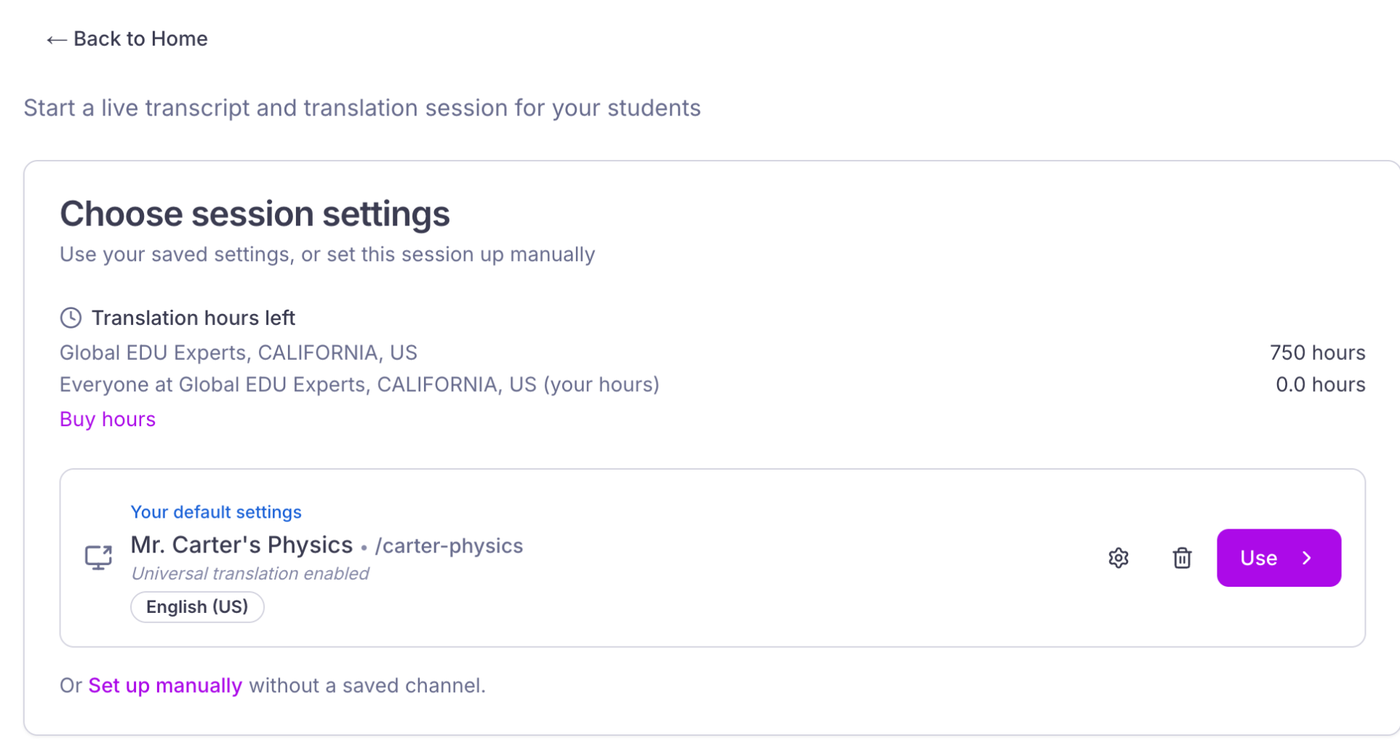
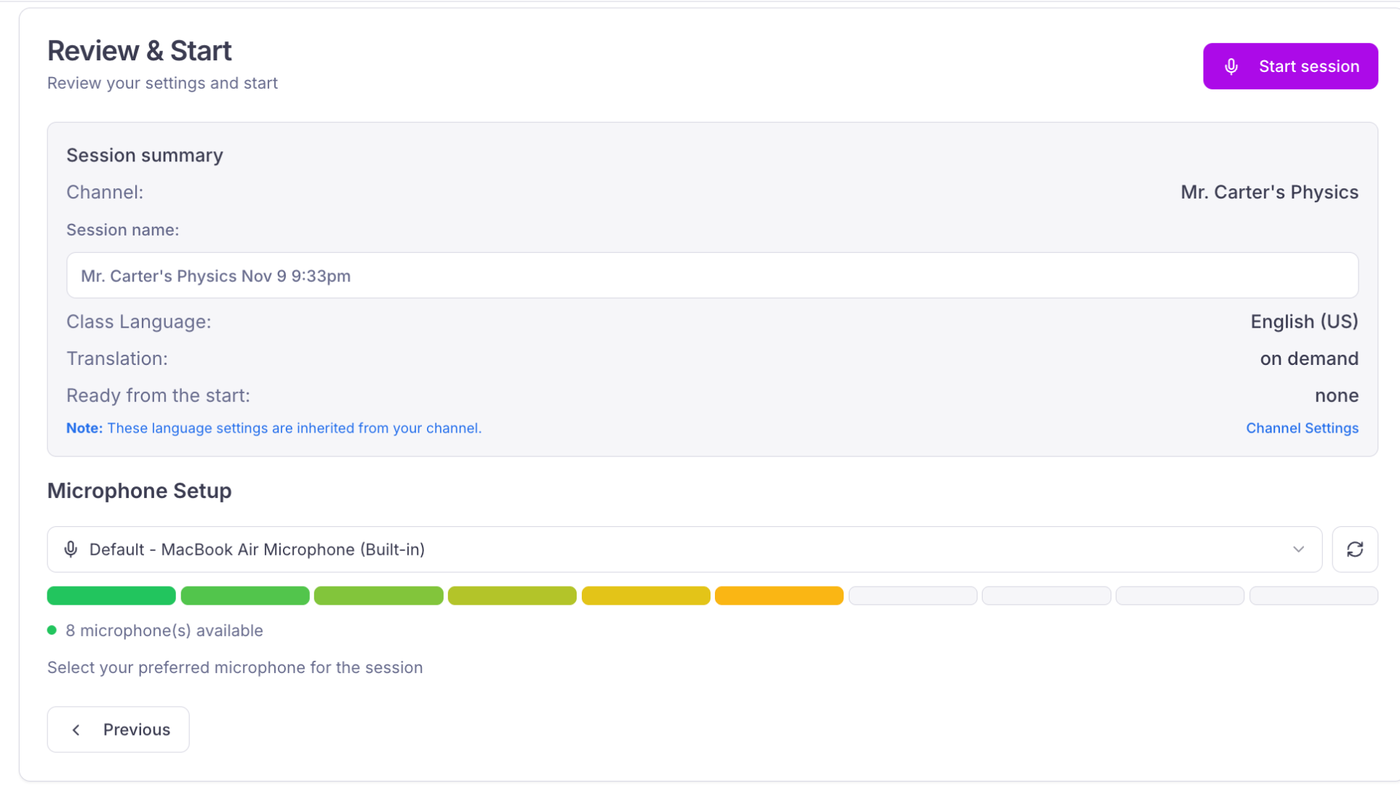
- Check the microphone. The first time, your browser asks for permission to use it: click Allow. If you don't see the request, click the refresh icon next to the microphone list. Choose the microphone you want, and check the level bar moves when you speak.
- Click Start session. The button waits until it hears a working microphone.
Step 6: Get your students in
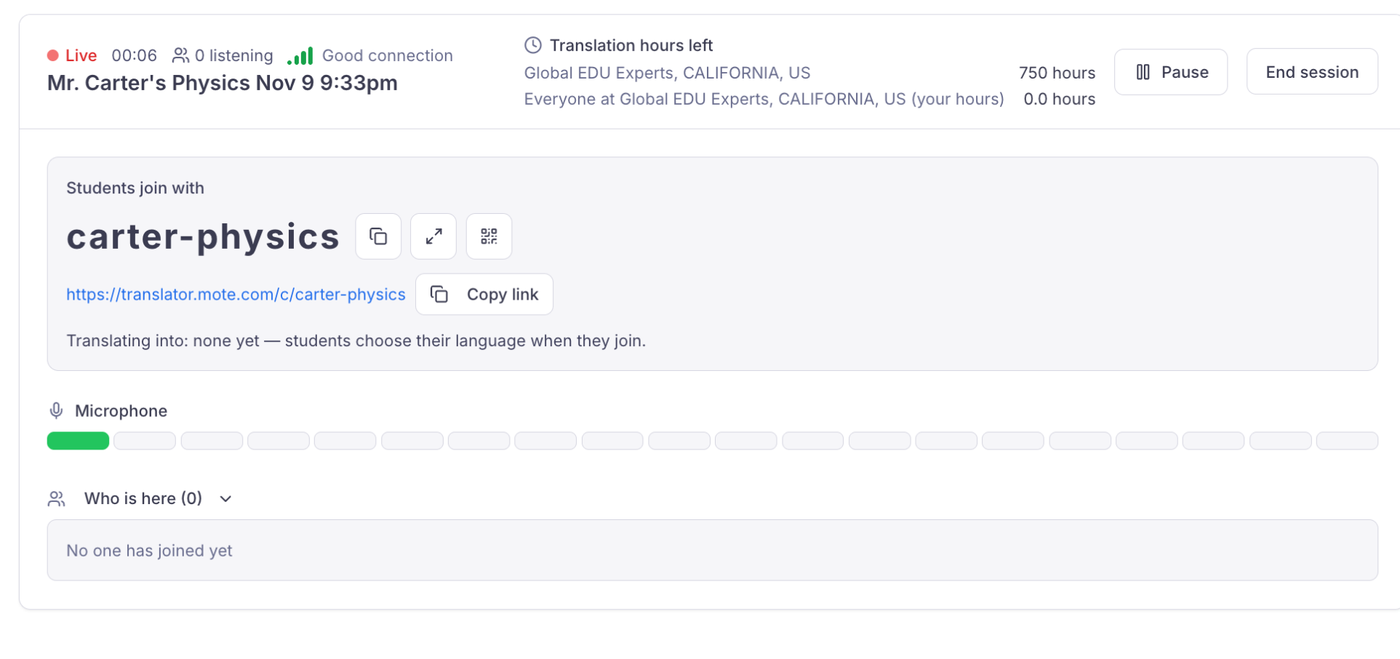
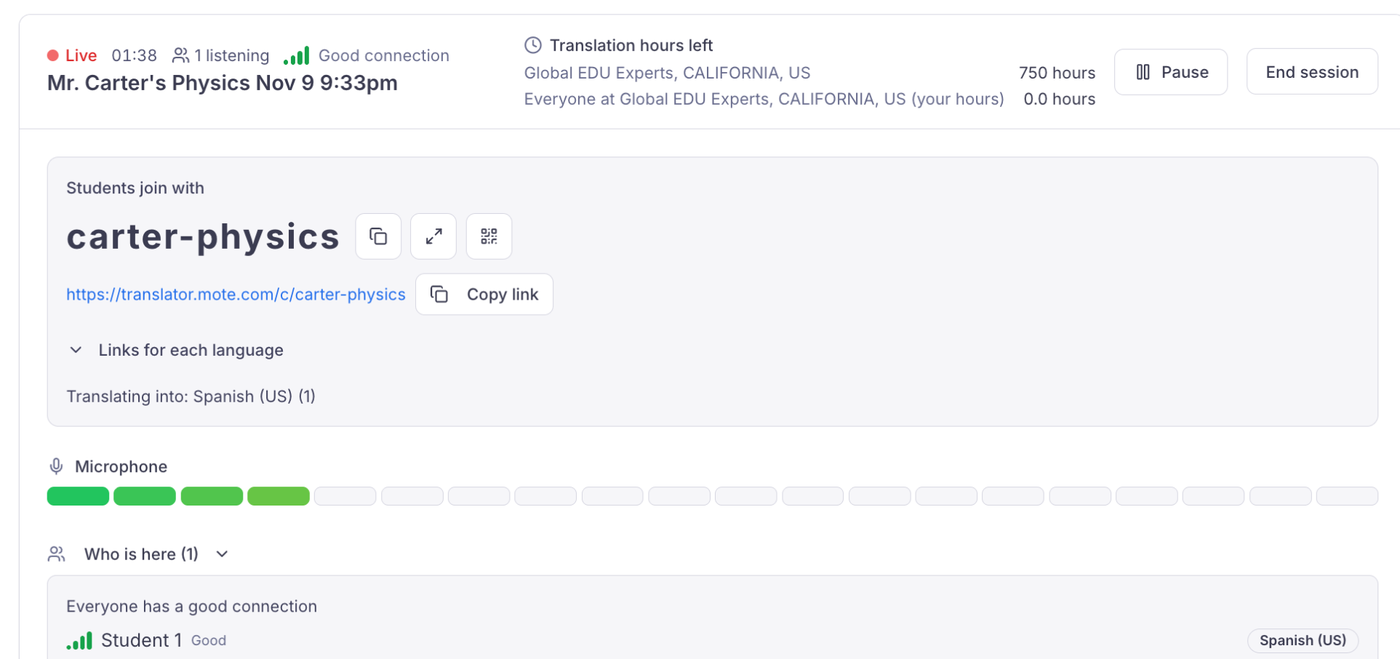
Once the session is live, the Students join with box shows everything your students need:
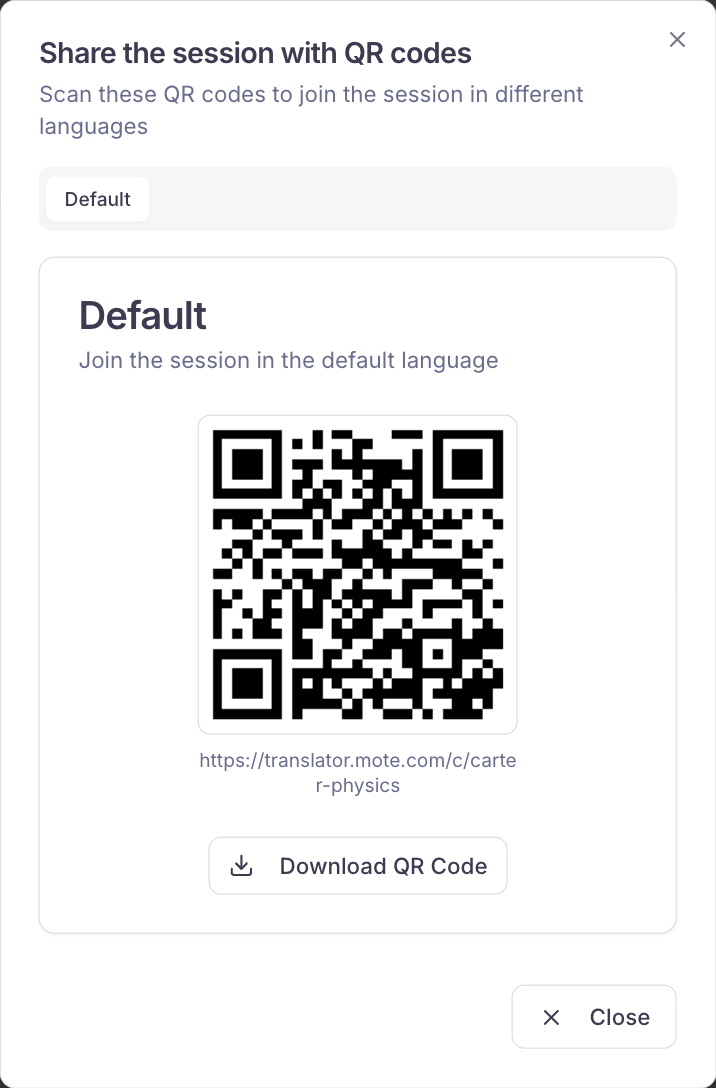
- The join link: click Copy link to post it in Google Classroom, your LMS or a class chat. A channel's link is translator.mote.com/c/ followed by your handle.
- The QR code: click the QR code icon, then Download QR Code to put it on a slide or print it for the classroom wall.
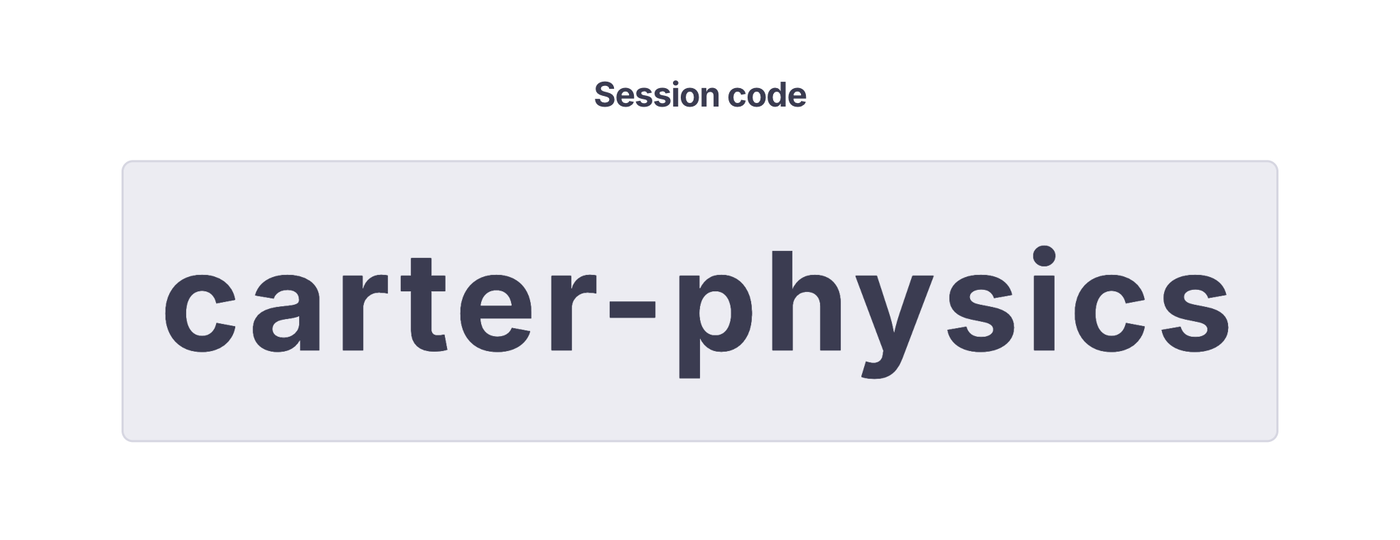
- The code on the board: click the expand icon to show your join code full screen on the projector.
Step 7: Test it before class
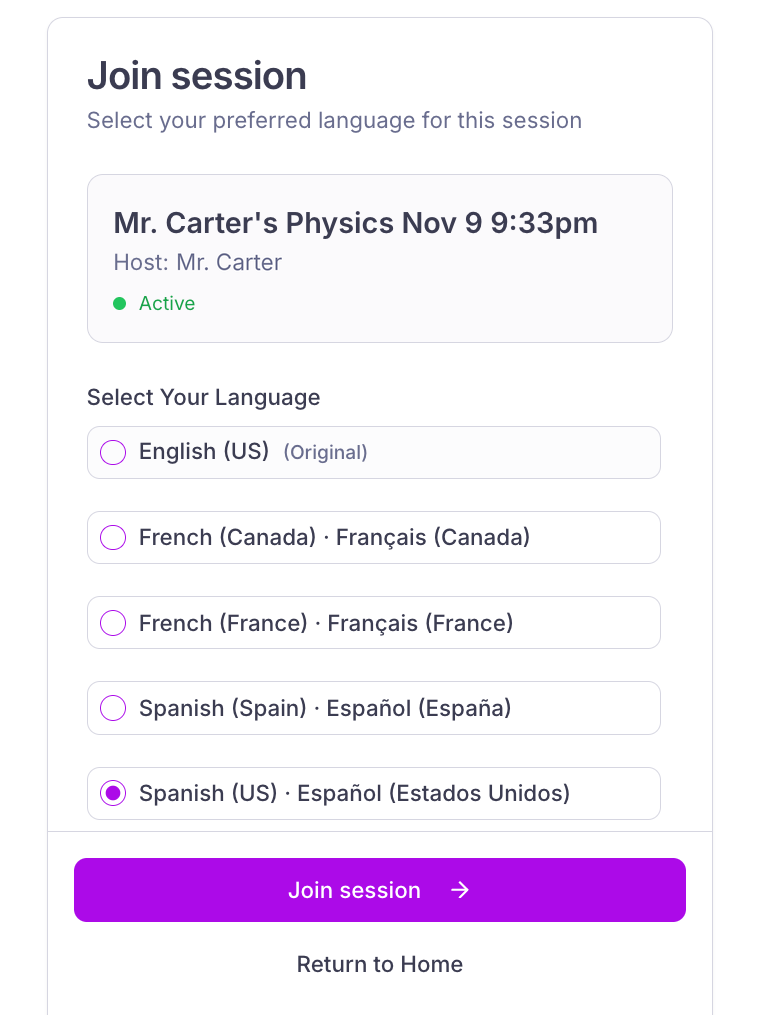
Open the join link in another browser tab, or scan the QR code with your phone, just as a student would. Choose a language and click Join session.
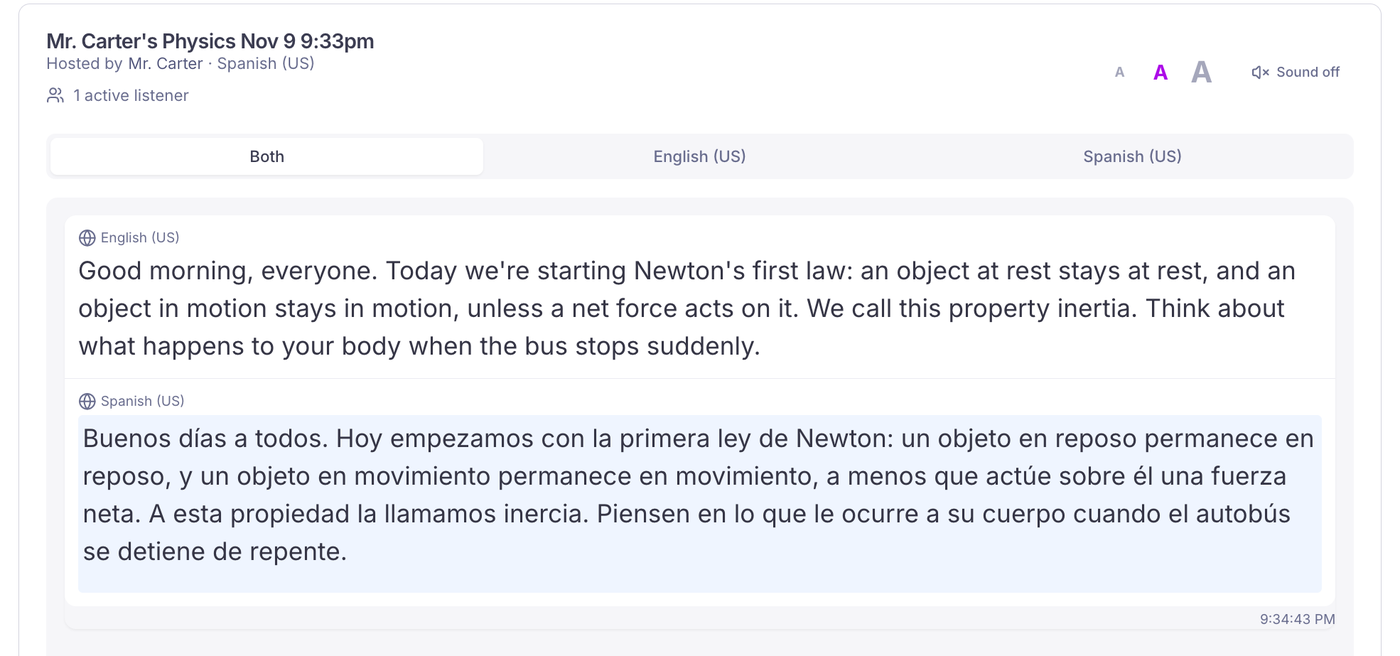
Say a few sentences of your lesson. The translation appears less than a second after you speak. Students can show both languages or just one, and make the text bigger with the A buttons.
Sound starts off, so student devices stay quiet. A student with headphones can click Sound off to turn it on and hear your lesson read aloud in their language.
Back on your session page, Who is here shows each student who has joined, their language and their connection. When you are done testing, click End session so you don't use up hours.
Good to know
- Sessions last up to 1 hour. A banner warns you 10 minutes before the end. For a longer lesson, start a new session on the same channel. The link and QR code stay the same.
- Your link and QR code don't change. Because they belong to your channel, students can bookmark the link and rejoin every lesson.
- How hours are used: each language your students choose counts. 60 minutes into 1 language uses 1 hour, and 20 minutes into 3 languages also uses 1 hour. See Mote Translator hours and pricing.
- Pause stops students hearing you until you click Resume, for example during a private conversation.
Questions? Email support@mote.com.